Choosing a Path
If you already have a pathway that nature decided to create, think about taking advantage of that. This is showing you where the water will naturally flow to, and it appears that a pitch (a steady decline in elevation that is used to move water downward) already exists.

One of the biggest mistakes homeowners make when they are trying to create a natural looking creek bed is that they lay it out as a straight and parallel pathway. If you are fortunate enough to live near a wooded area, considering going on a hike to note how creeks and streams appear in nature.
While the shape of your creek bed may be determined somewhat by preexisting boulders, trees or hills, there are measures you can take to ensure that it has a realistic look and feel. Notice how most creek beds serpentine. They are said to “meander” and they are rarely linear in nature. Also, you may instinctively lay the edges perpendicular to each other- but in order to keep it looking natural, you’ll want to your creek bed to vary in width- getting both wider (on the outer curves, to mimic erosion) and narrower in along the way. Inner curves can include a “beach”, called a point bar, of smaller pebbles and plants to mimic deposition. Try using an extended garden hose as a guide to play with what looks best in your space. This way, you can step back and adjust as-needed before you dig.
Choosing Stones for your Creek Bed
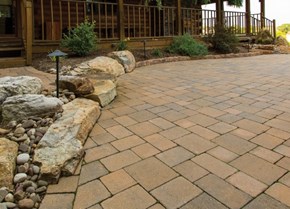
It’s a good idea to have at least three sizes of rocks in you creek bed. Select stones that are indigenous to your area. Another common mistake that is made is to place all of the smaller rocks or stones in the center of the bed and then flank it with the larger stones. If you think about it, flowing water would actually push the smallest stones up and onto the banks where they would collect near boulders or branches. As a general rule of thumb, use the middle sized stones in the middle, smaller ones towards the banks, and the larger ones (or boulders) in odd numbered groupings near the edges. It is also helpful to half-bury a few of the larger rocks in the middle of your creek. This not only gives a more realistic look and feel, but it helps to slow the speed of any flowing water.
TIP: When placing your stone, be sure to place them up higher than the anticipated water level to prevent soil erosion.
Digging In
Not all dry creek beds need to be dug out, some are strictly ornamental. However, if you are digging out a bed, smart digging means calling 811 before you begin. Digging without calling can disrupt service to an entire neighborhood, harm you and potentially result in fines and repair costs. This free service gets your underground utility lines marked for free. You can call anywhere in the country a few days prior to digging, and your call will be routed to your local One Call Center. Tell the operator where you’re planning to dig and what type of work you will be doing and your affected local utilities companies will be notified about your intent. In a few days, they’ll send a locator to mark the approximate location of your underground lines, pipes and cables, so you’ll know what’s below – and be able to dig safely.
- Once you know that your intended path is safe you can begin digging. To keep it looking natural, try to keep it a width-to-depth ratio of 2:1. Meaning: if you would like your dry creek bed to be about 4 feet wide, make it about 2 feet deep.
- Chances are, if you garden has trees or large bushes, will run into some tree roots during excavation. Large structural roots can be left as is to provide a natural look; as if water eroded the land under them over time.
- Don’t forget to pitch your creek bed at an angle from top to bottom. If your landscape is flat, you can dig it deeper at the end.
With a little planning and your artist’s eye, you can turn an eyesore into a beautiful garden feature.